
Proper texture maps equal realism.
A bold statement? Perhaps. I’m not saying that the texture maps currently in MX Bikes are bad. What I am saying is that we have forgotten how important specular and reflection maps are in MX Bikes (or any game for that matter).
Object realism is determined by whether we can read a material for what it is. We know it’s a bike’s frame is made of aluminium. Not because this is stated in the bike’s manual but because we recognize the colour, shine and reflective characteristics of the material. Currently in MX bikes there have been no real attempts to mimic these material characteristics. Mainly because many consider the specular and reflection maps to be broken and therefore obsolete. Resulting in nearly everything looking like plastic, almost toy-like.
This is where my journey started. Creating my very first MX bikes skin while wanting to achieve what seemed to be the impossible; realism. I’ve done my utmost best to understand the maps that we were given. At first it made no sense but after many failed attempts it suddenly clicked!
The specular map tells the game how much shine has to be applied on which area of the bike. This isn’t determined per part (e.a. A frame, plate or seat) but by pixel. This also means that one single part can hold multiple levels of shine. The exact same can be said for the reflective map with the only difference that we’re now talking levels of reflection instead of shine. But what do with this? Well how about throwing a curvature map in combination with an ambient occlusion map at it. Here is why:
A curvature map is a texture that stores the convexity and concavity of the mesh. In real life an object will always appear more shiny or reflective on convex edges and more dull on concave edges due to the restraints of how much light can hit these areas. The curvature map renders this data in greyscale map with the convex edges being brightest and concave areas being darkest.
An ambient occlusion (AO) map creates soft shadowing, as if the model was lit without a direct light source, like on a cloudy day. In real life we can only see shine and reflection when light hits the object. We can rarely see shine and reflection when an object is cast in shadow. The ambient occlusion map renders this data in a greyscale map where the brighter areas justify where light was able to hit the object and the darker areas justify where no light was able to hit the object thus being in the shade.
Applying the curvature and ambient occlusion map to both the specular and reflection map already helps the game drastically to make an object look more lifelike and realistic. MX Bikes does not feature fancy ray trace effects to determine all the data mentioned in the previous two paragraphs. It needs to be fed a map that contains this data. So feed it!
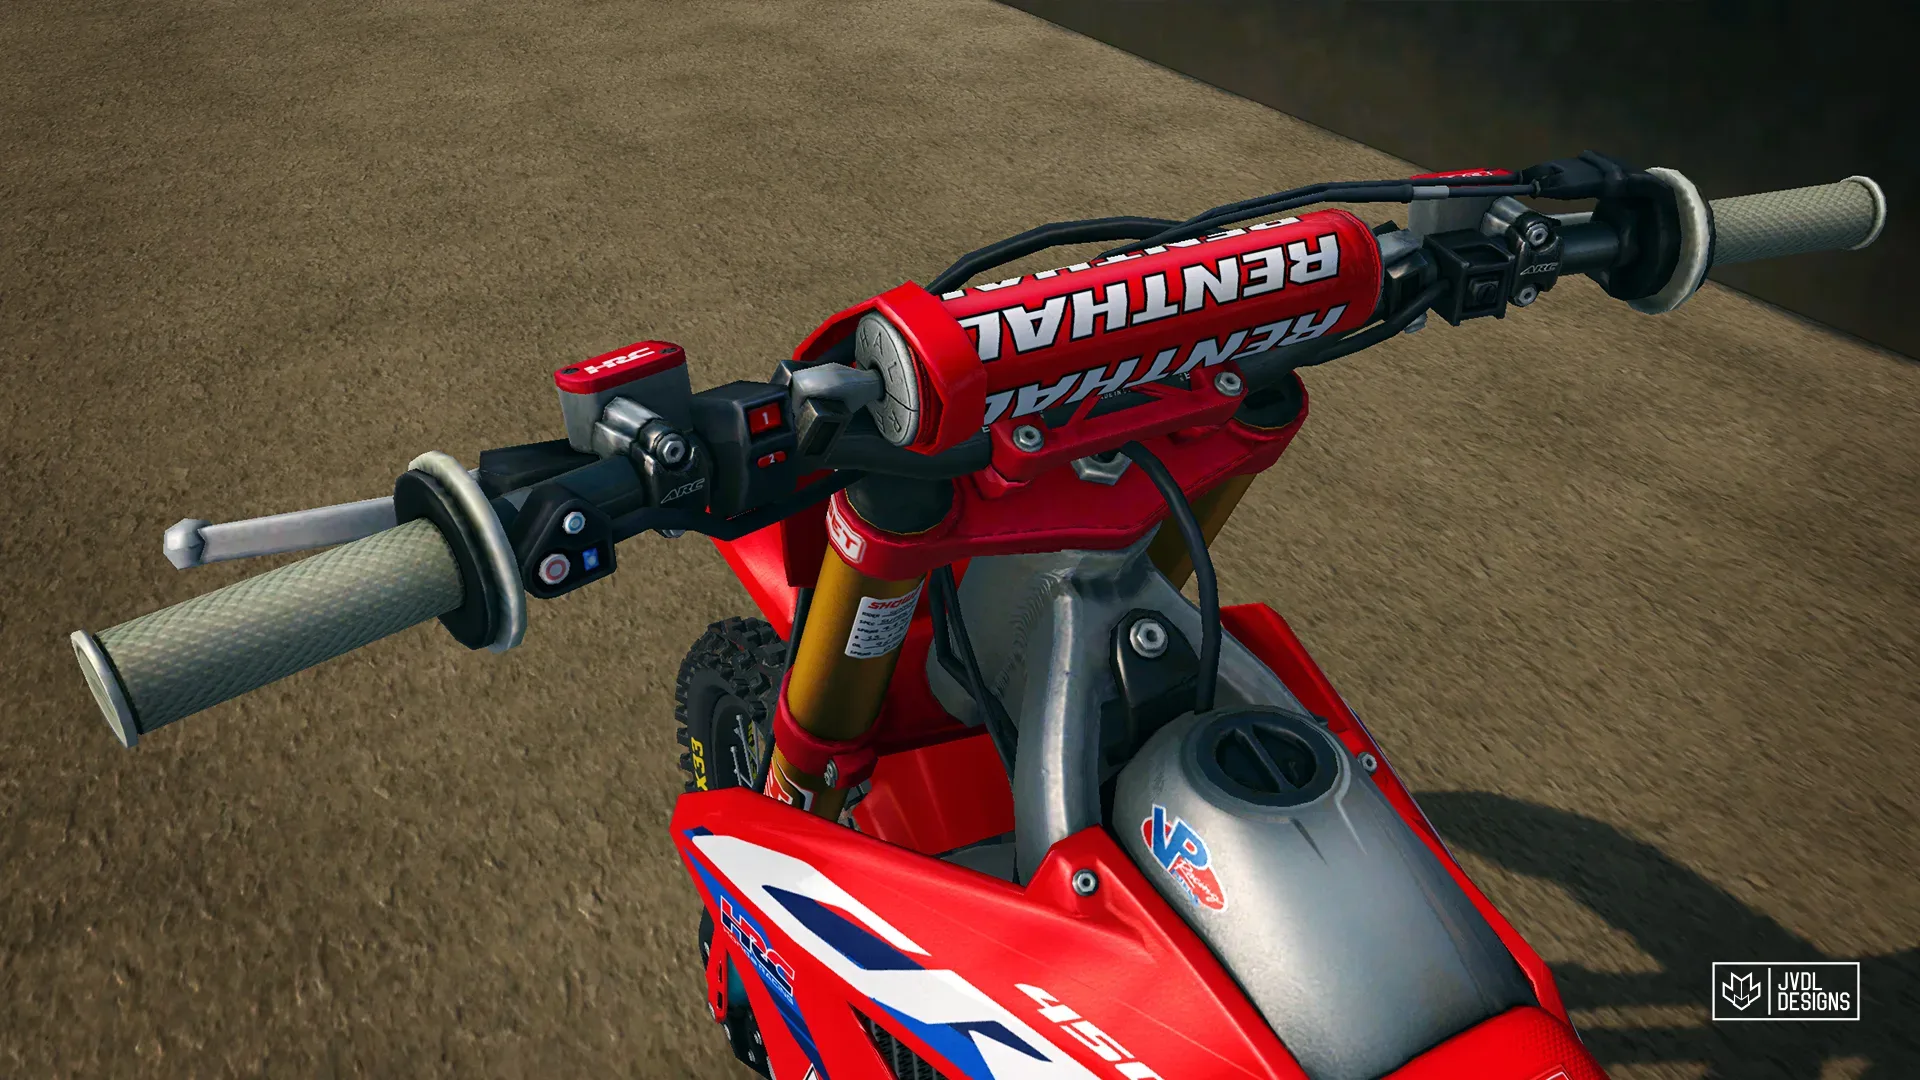
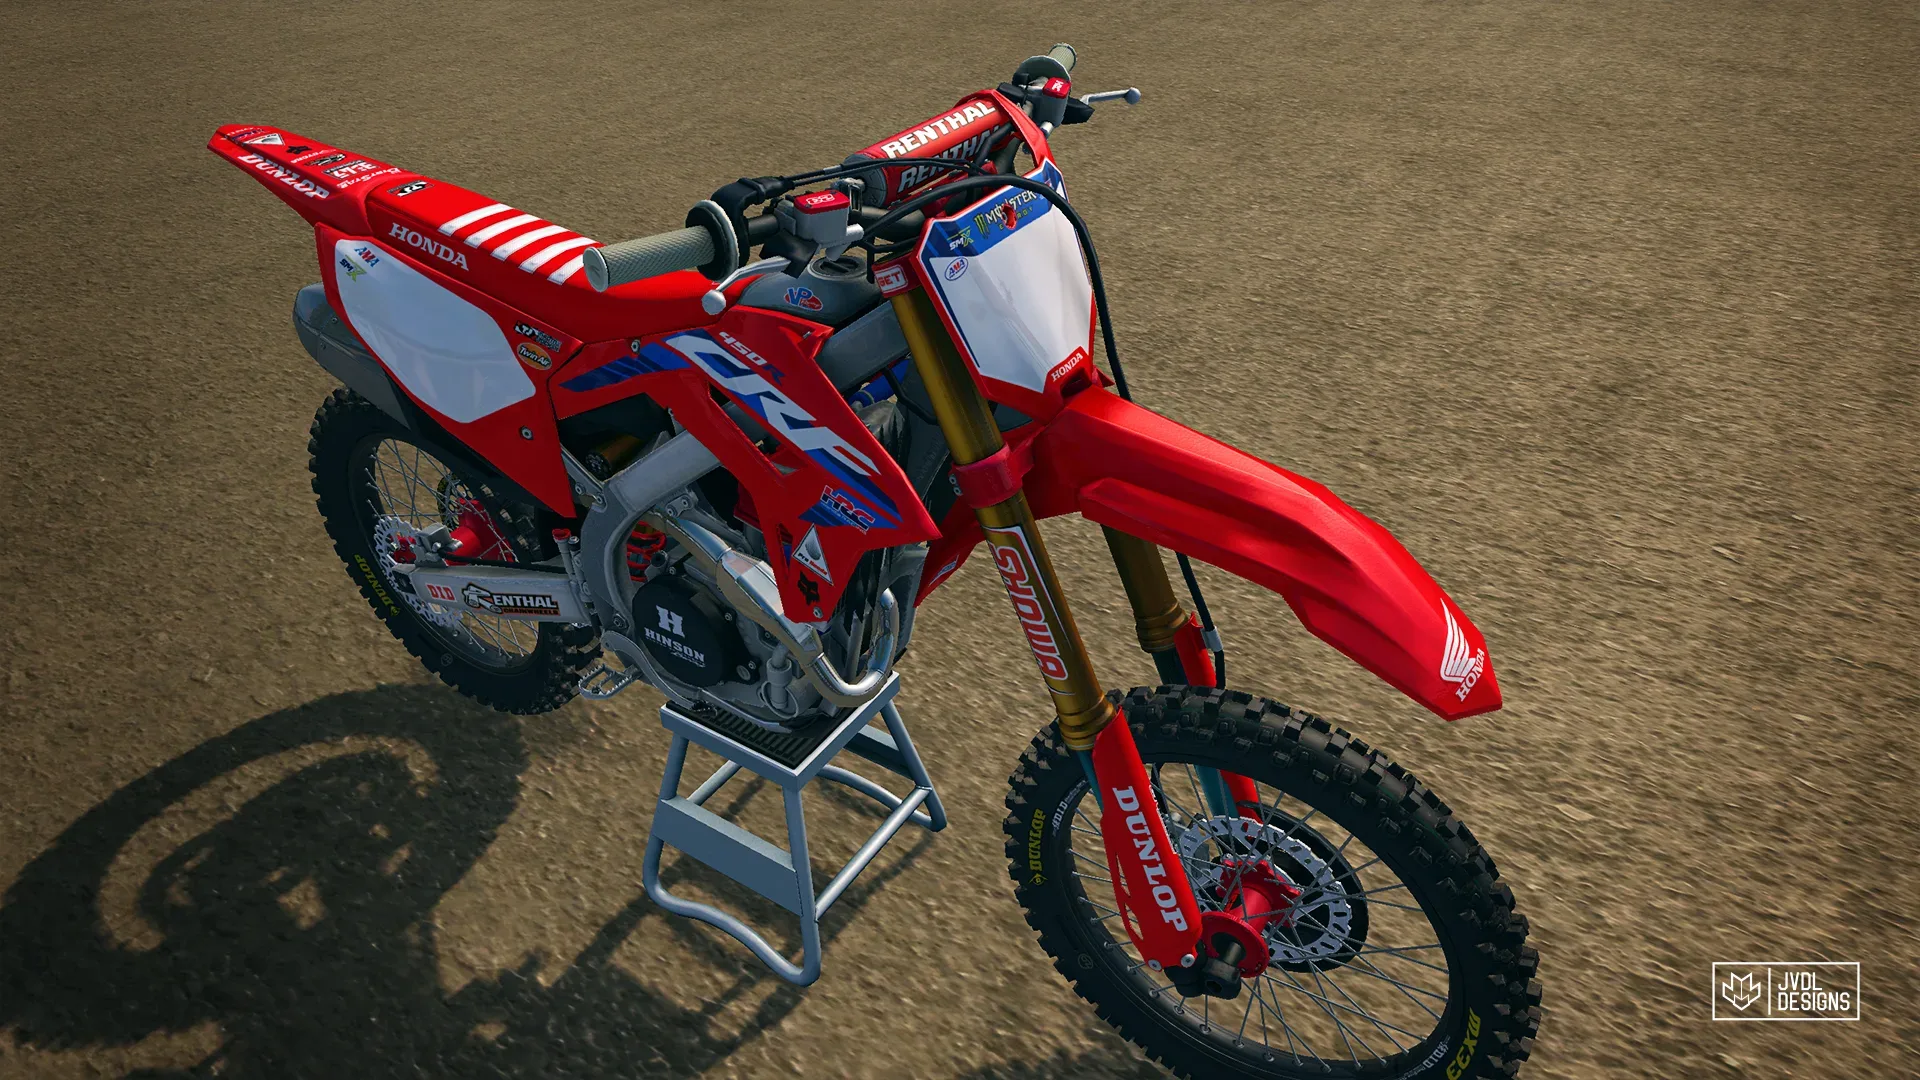
Now that we have established a proper base we can take it a step further. The first order of business is to split your maps into material types. For example your frame will be more shiny and reflective than your seat. So you create a “levels modifier” layer for all these different material groups like metal, plastic, rubber and address the alpha channel to select parts accordingly. In these “level modifiers” you only have to worry about “output levels”. The first value will almost always be the default “0” but the second value will vary per material group or part. For example my metals have a value of 200 or more, my plastics are somewhere between 100 and 175, and my rubbers are around 50 to 75. These values will vary between the specular and reflection map where almost always the reflection map will be quite a bit darker than the specular map.
To really kick things to another level; Add texture and wear to your specular map! Nothing in real life is perfectly smooth and everything has a texture to it. So mimic this on your specular maps. Let metal parts have a metal grain, let plastic have a slight orange peel, and so forth. On top of this add wear like scratches and other imperfections. You don’t want to be that poser that brings an untouched showroom bike to the track on Sunday. Trust me.
IMPORTANT!: Min/max values concerning specular and reflection maps are set in stone when a model is exported to MX bikes. This means that some models might give you a VERY hard time when attempting a proper specular or reflection map. It all comes down to if the min/max values are set correctly.
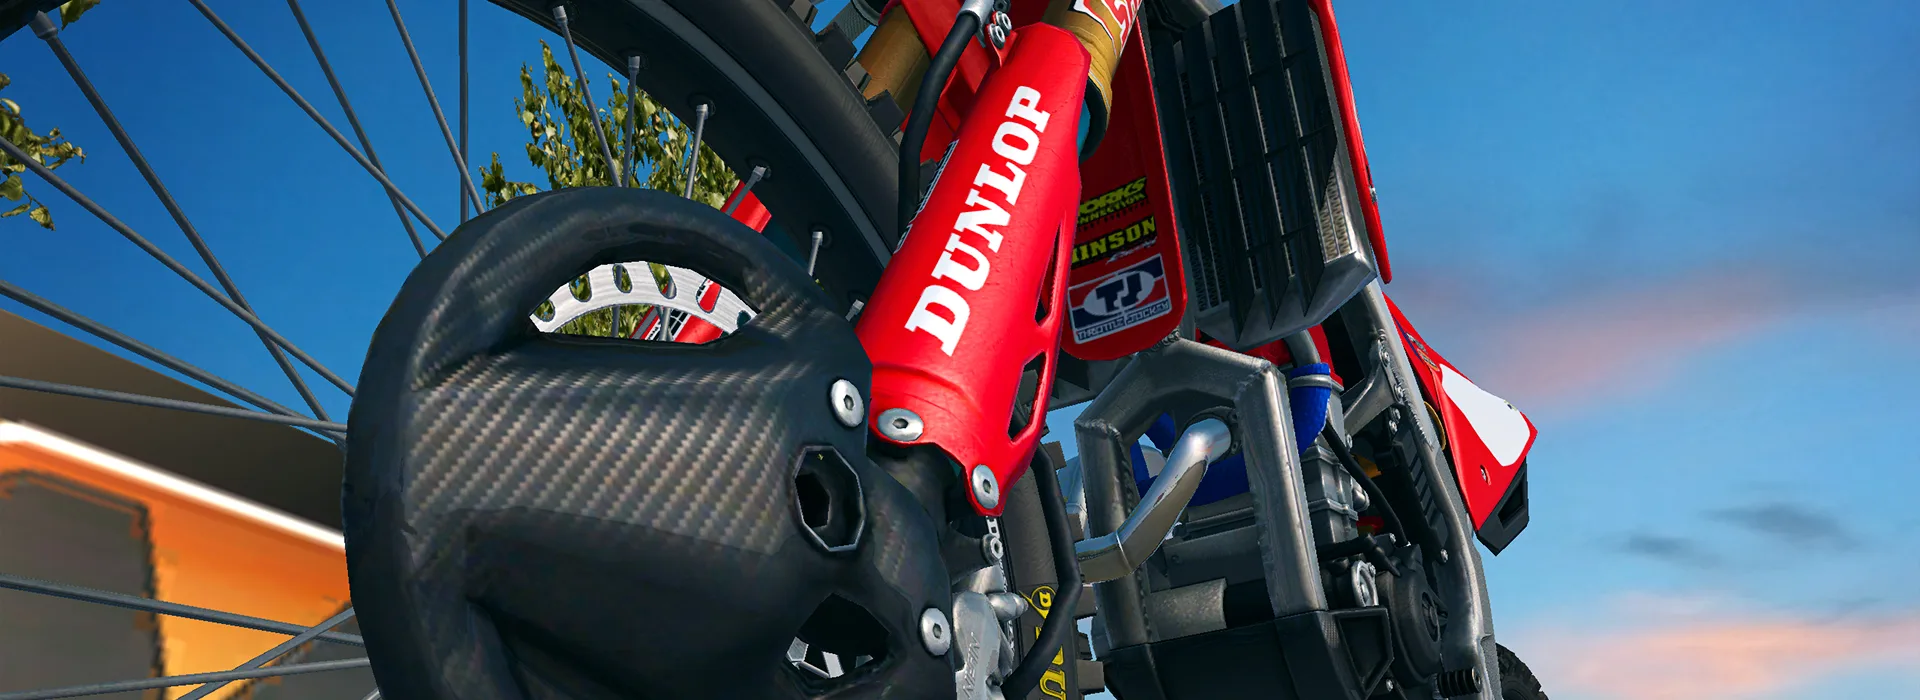
The Honda CRF250 and CRF450 have been fully updated and received a complete texture revamp. A perfect example of what your texture maps might look like when you apply above mentioned knowledge.
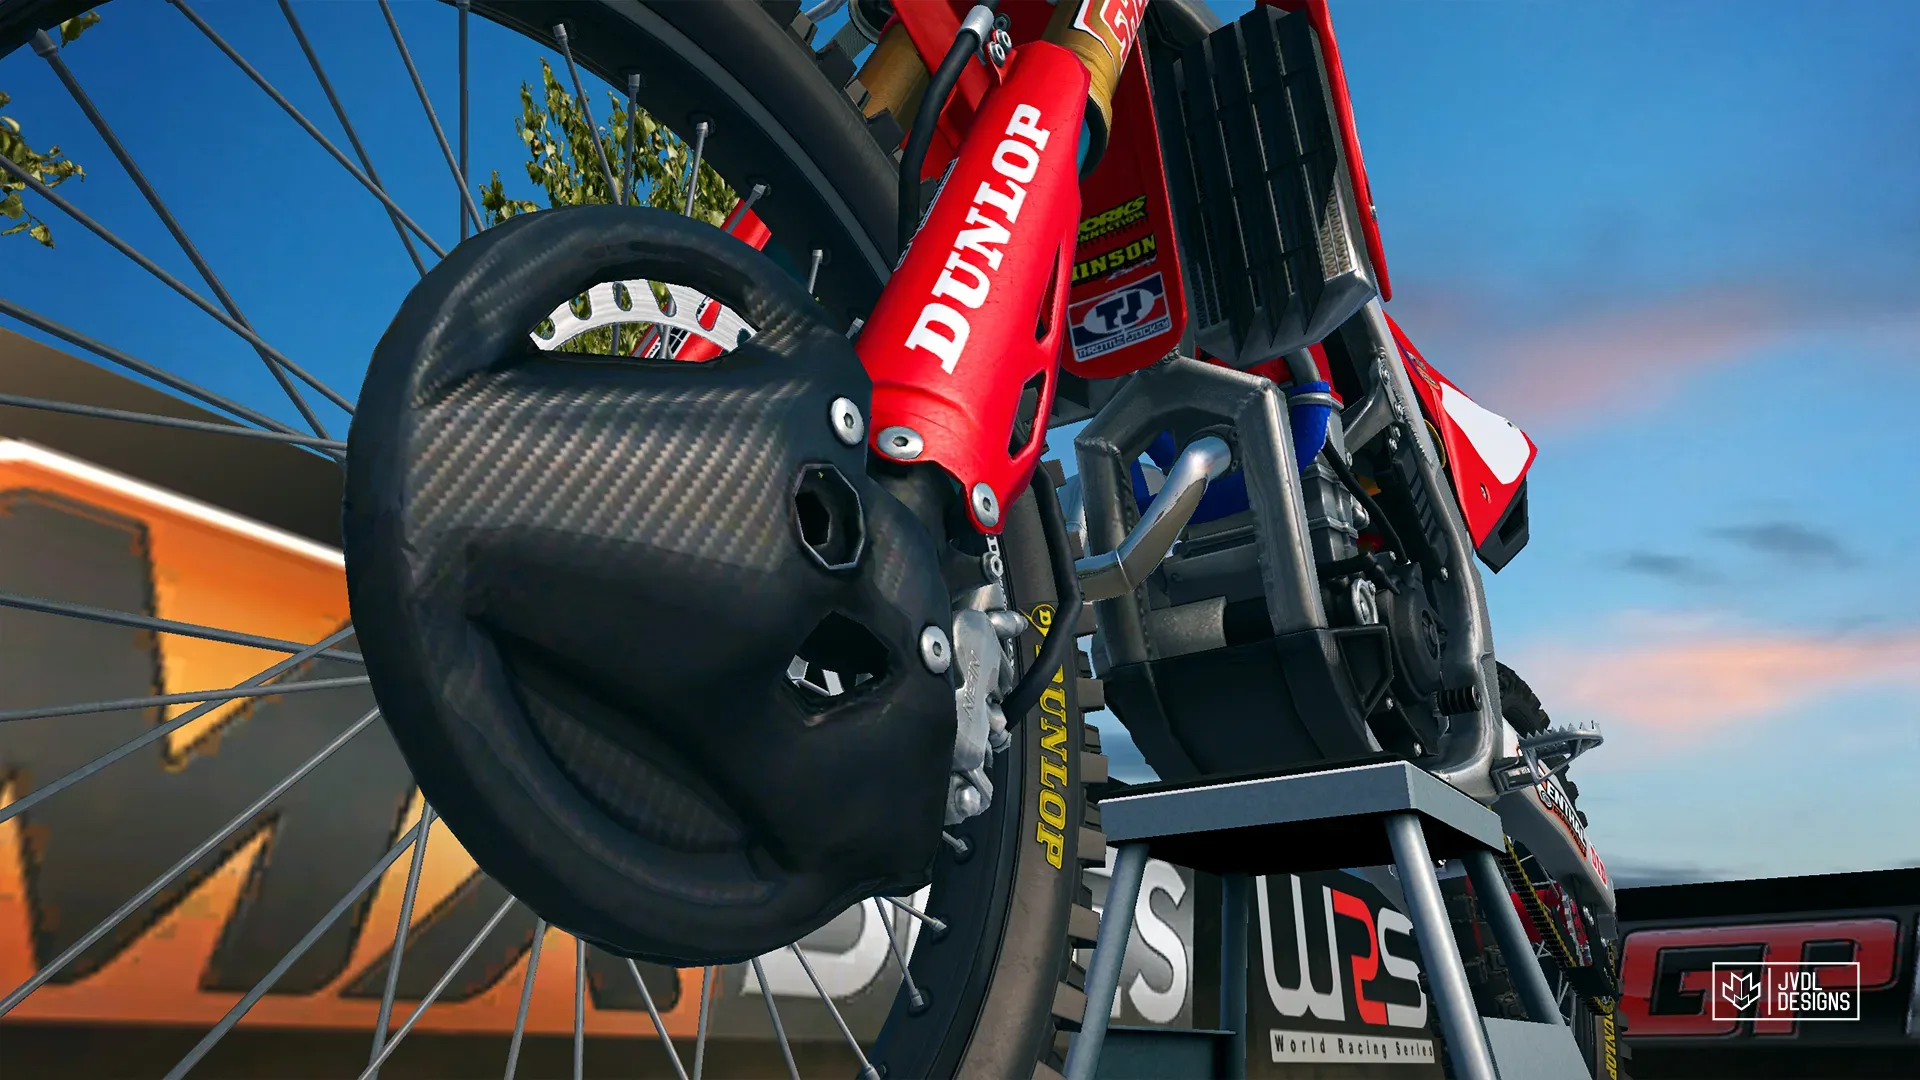
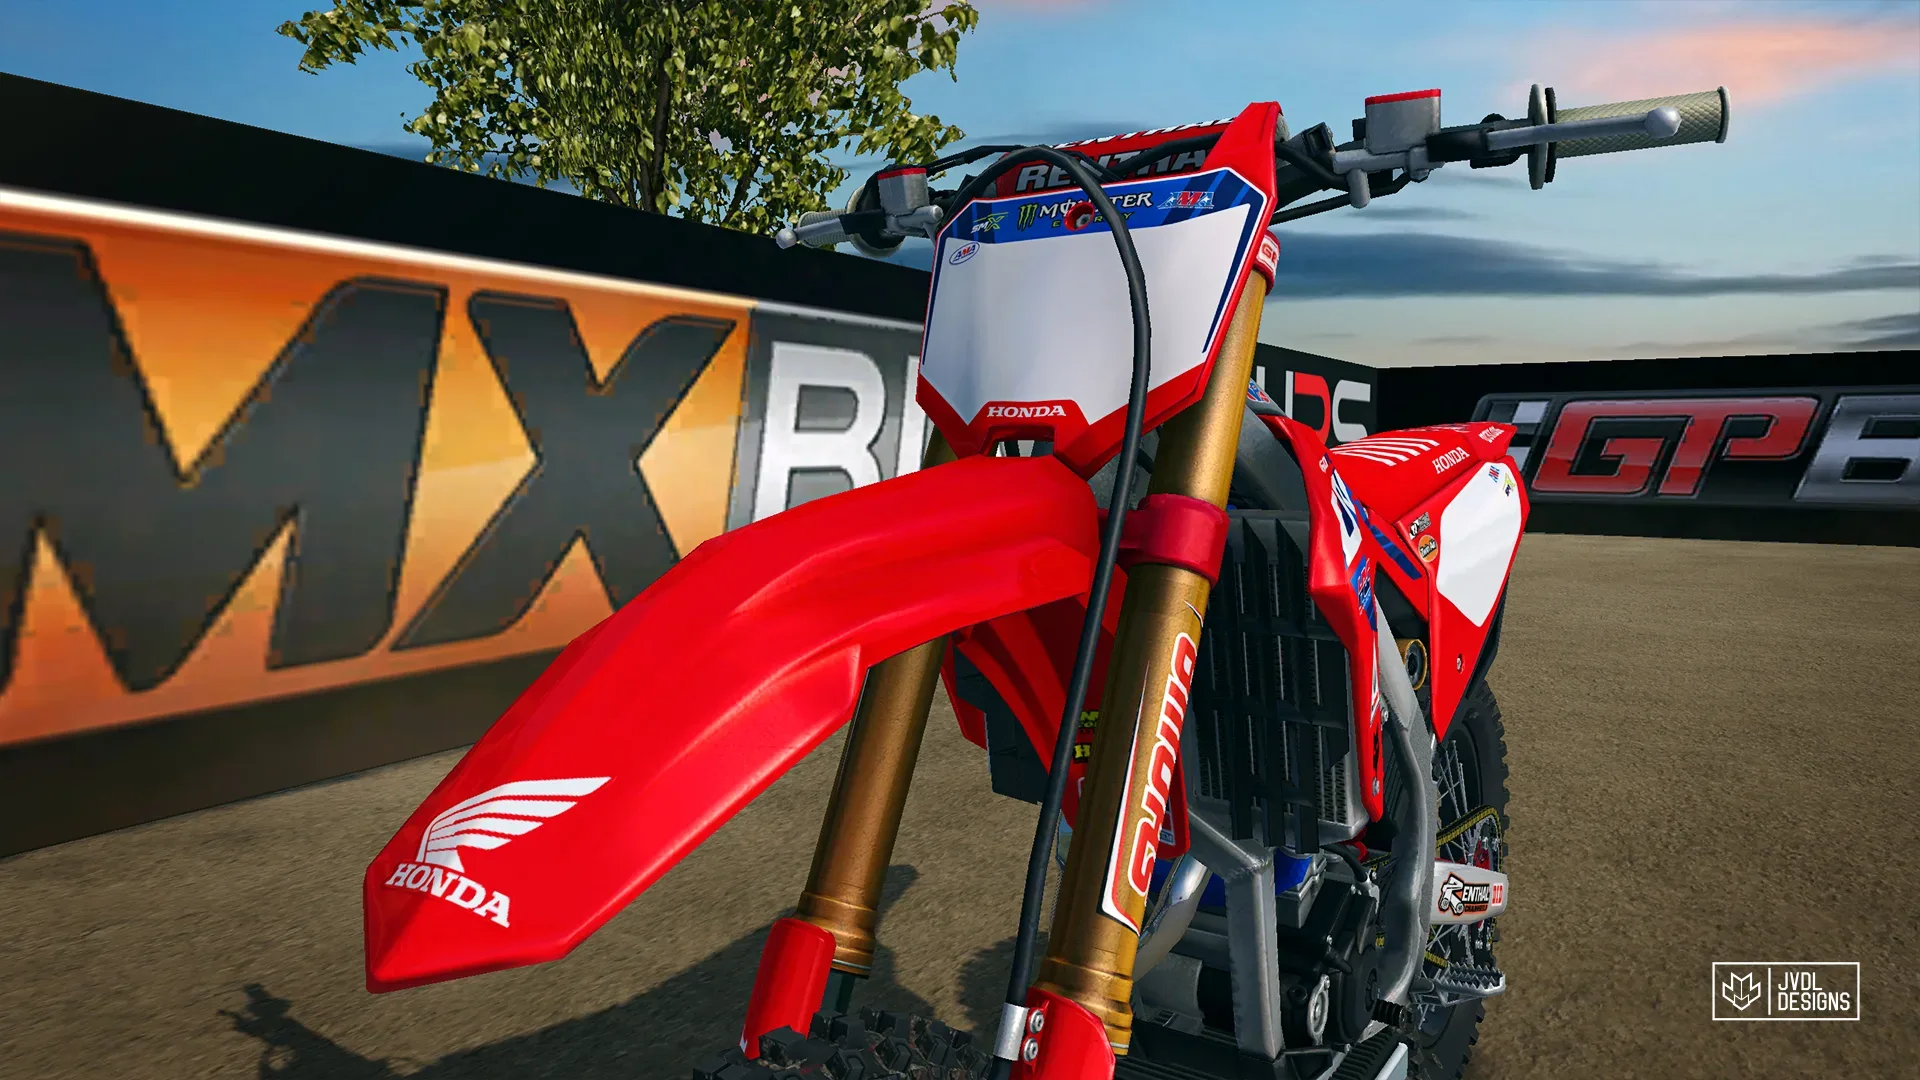
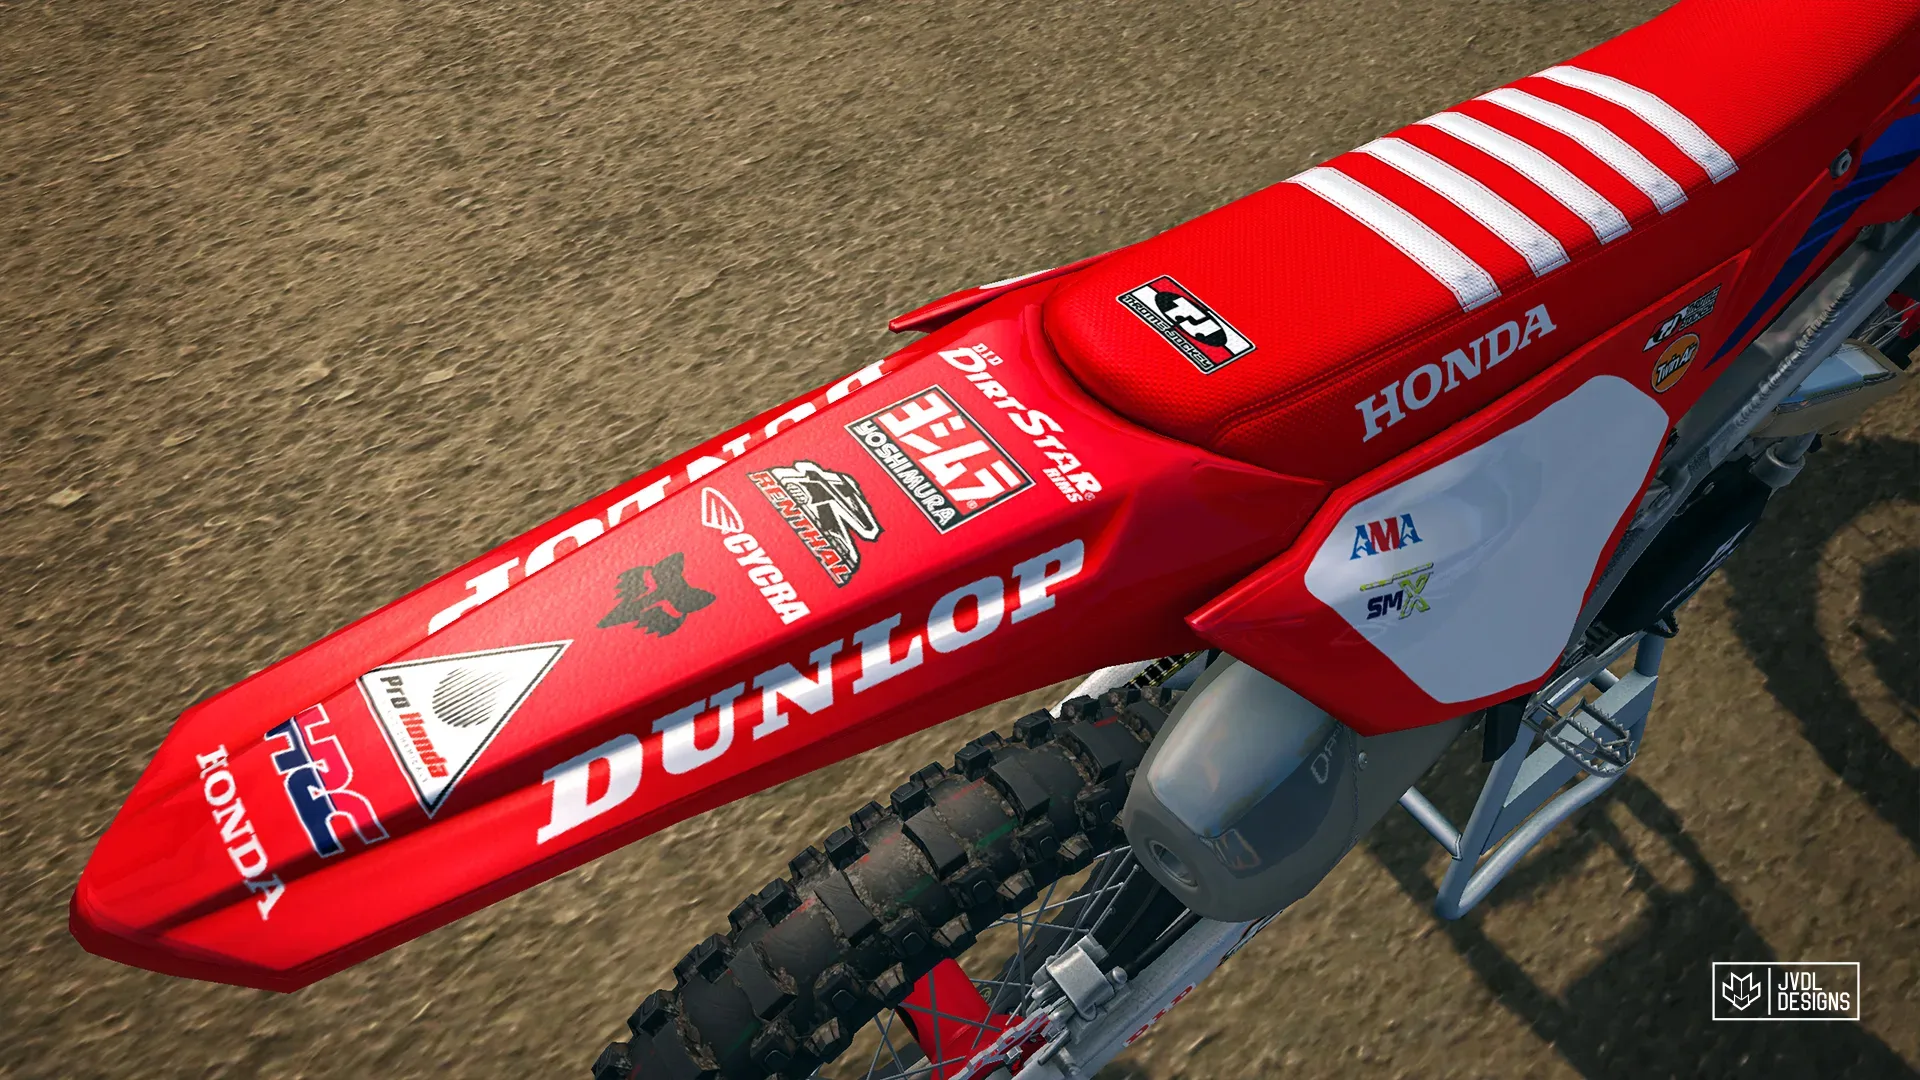
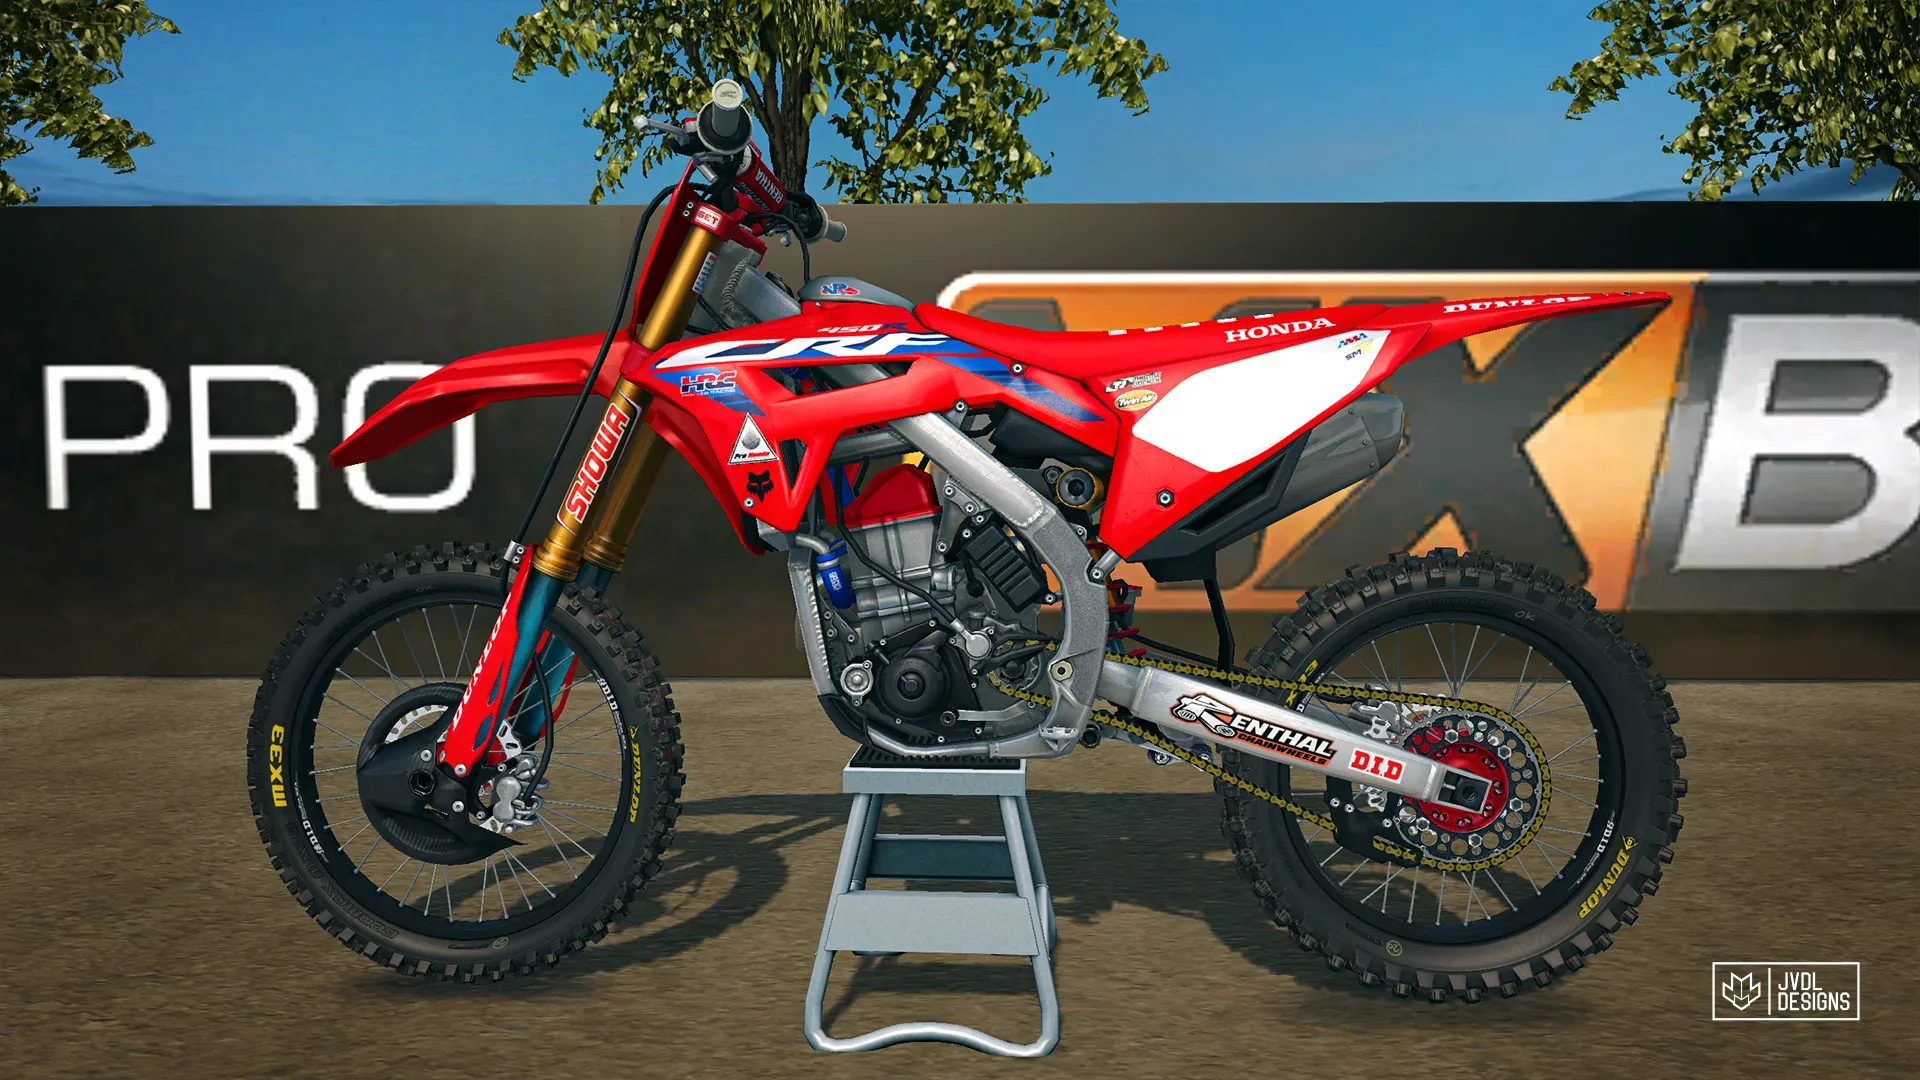
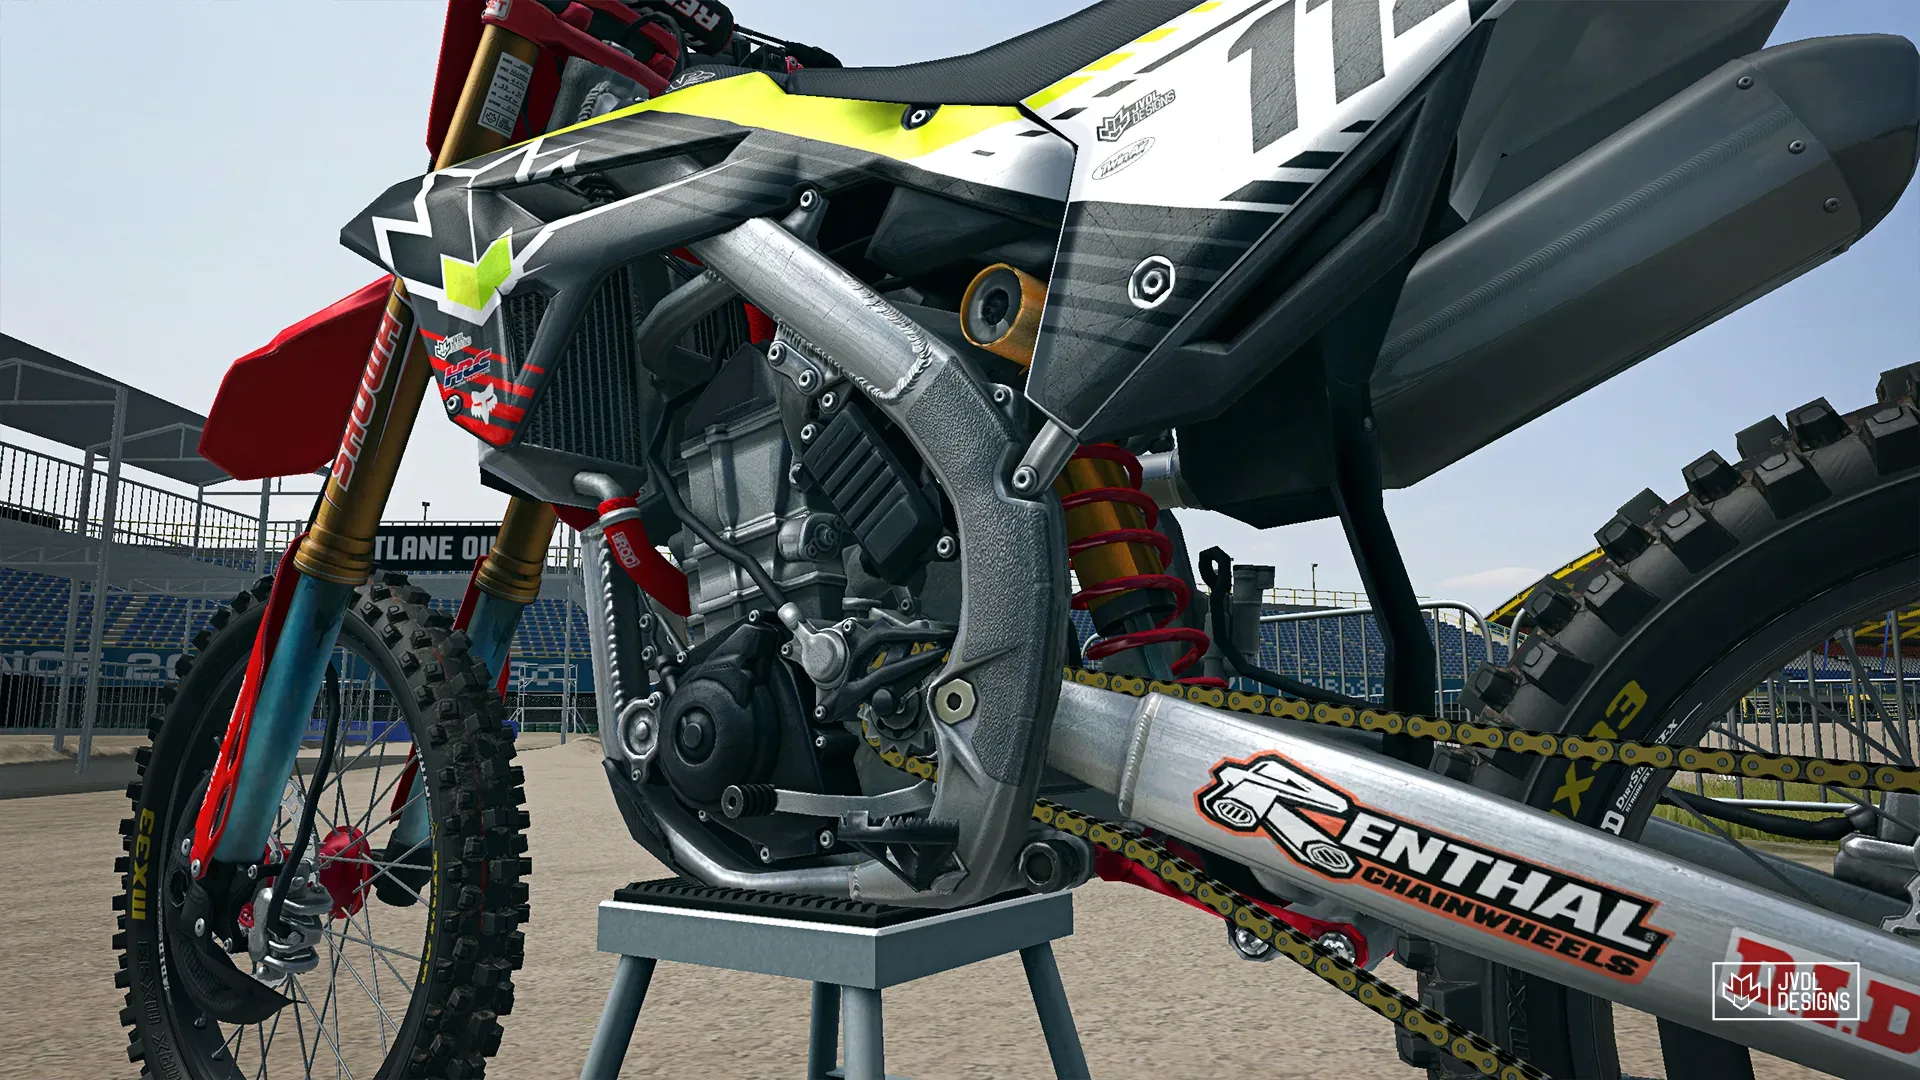
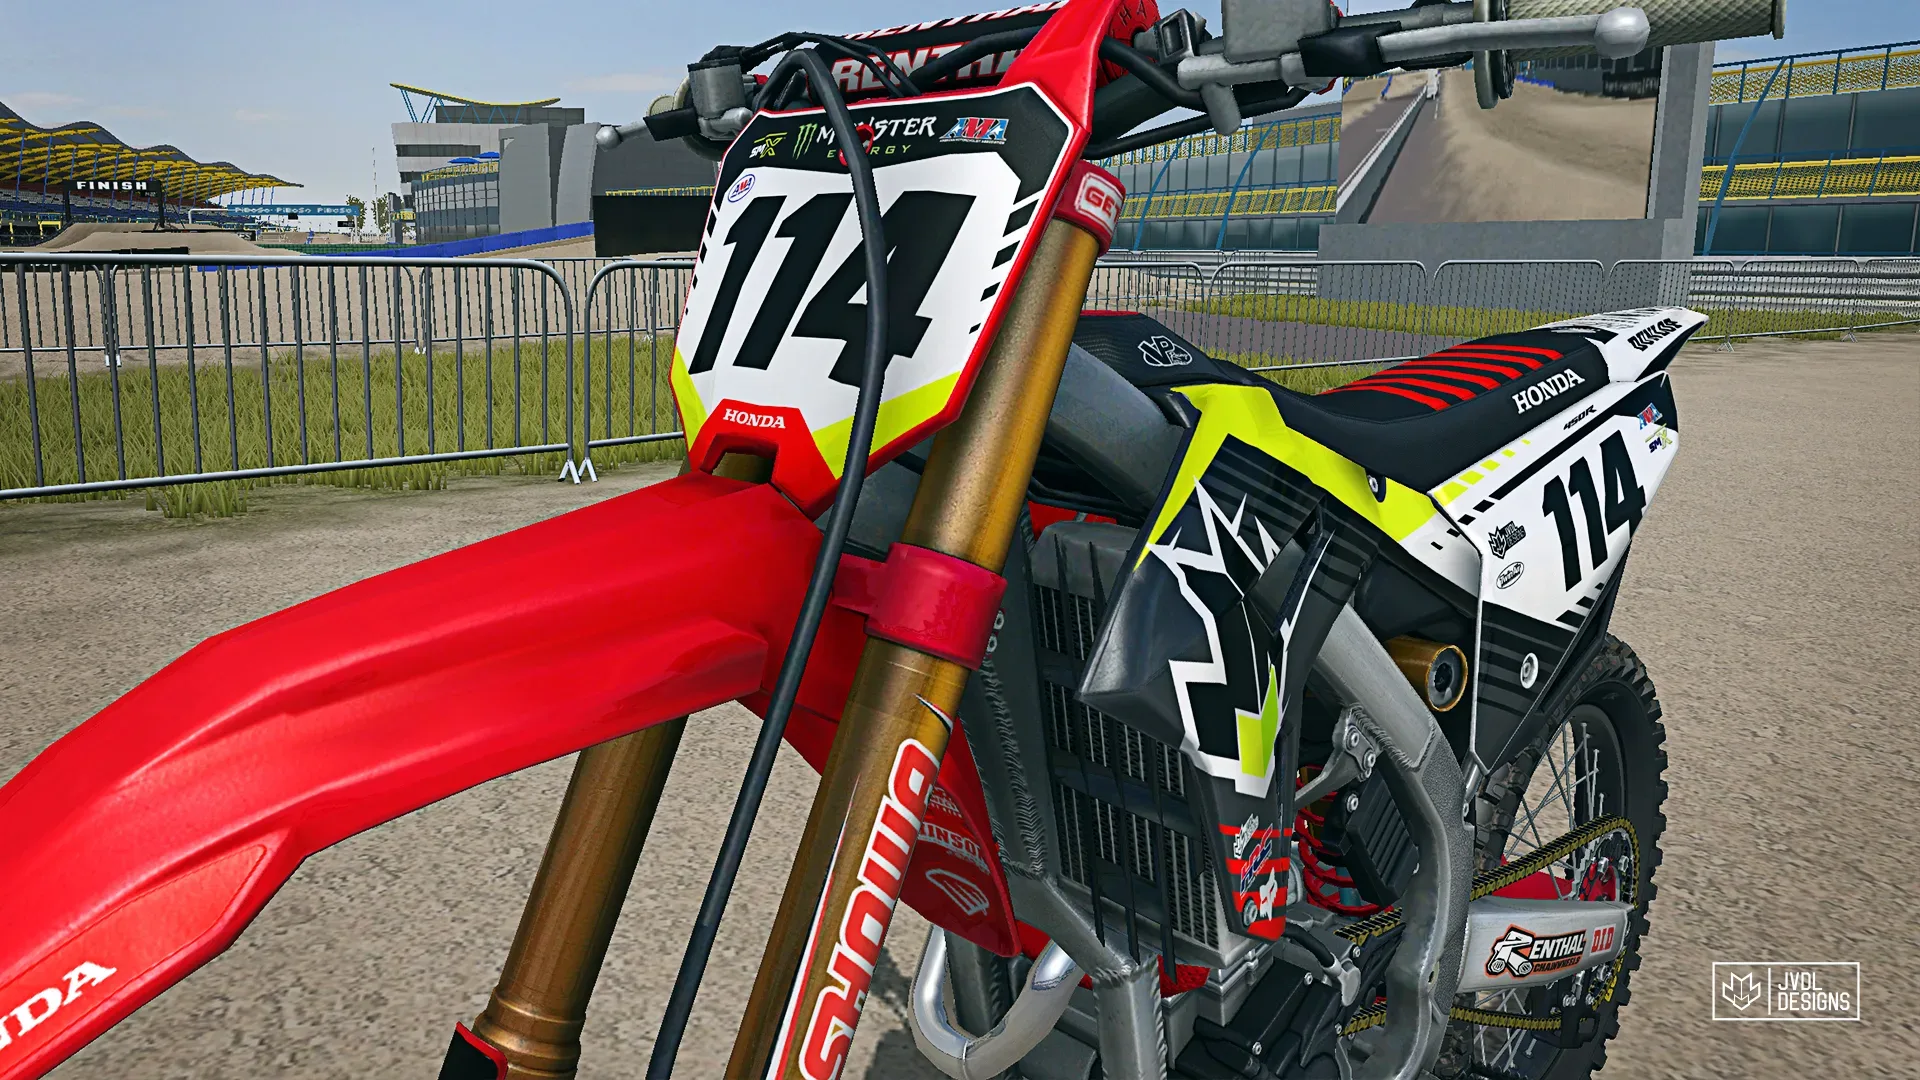
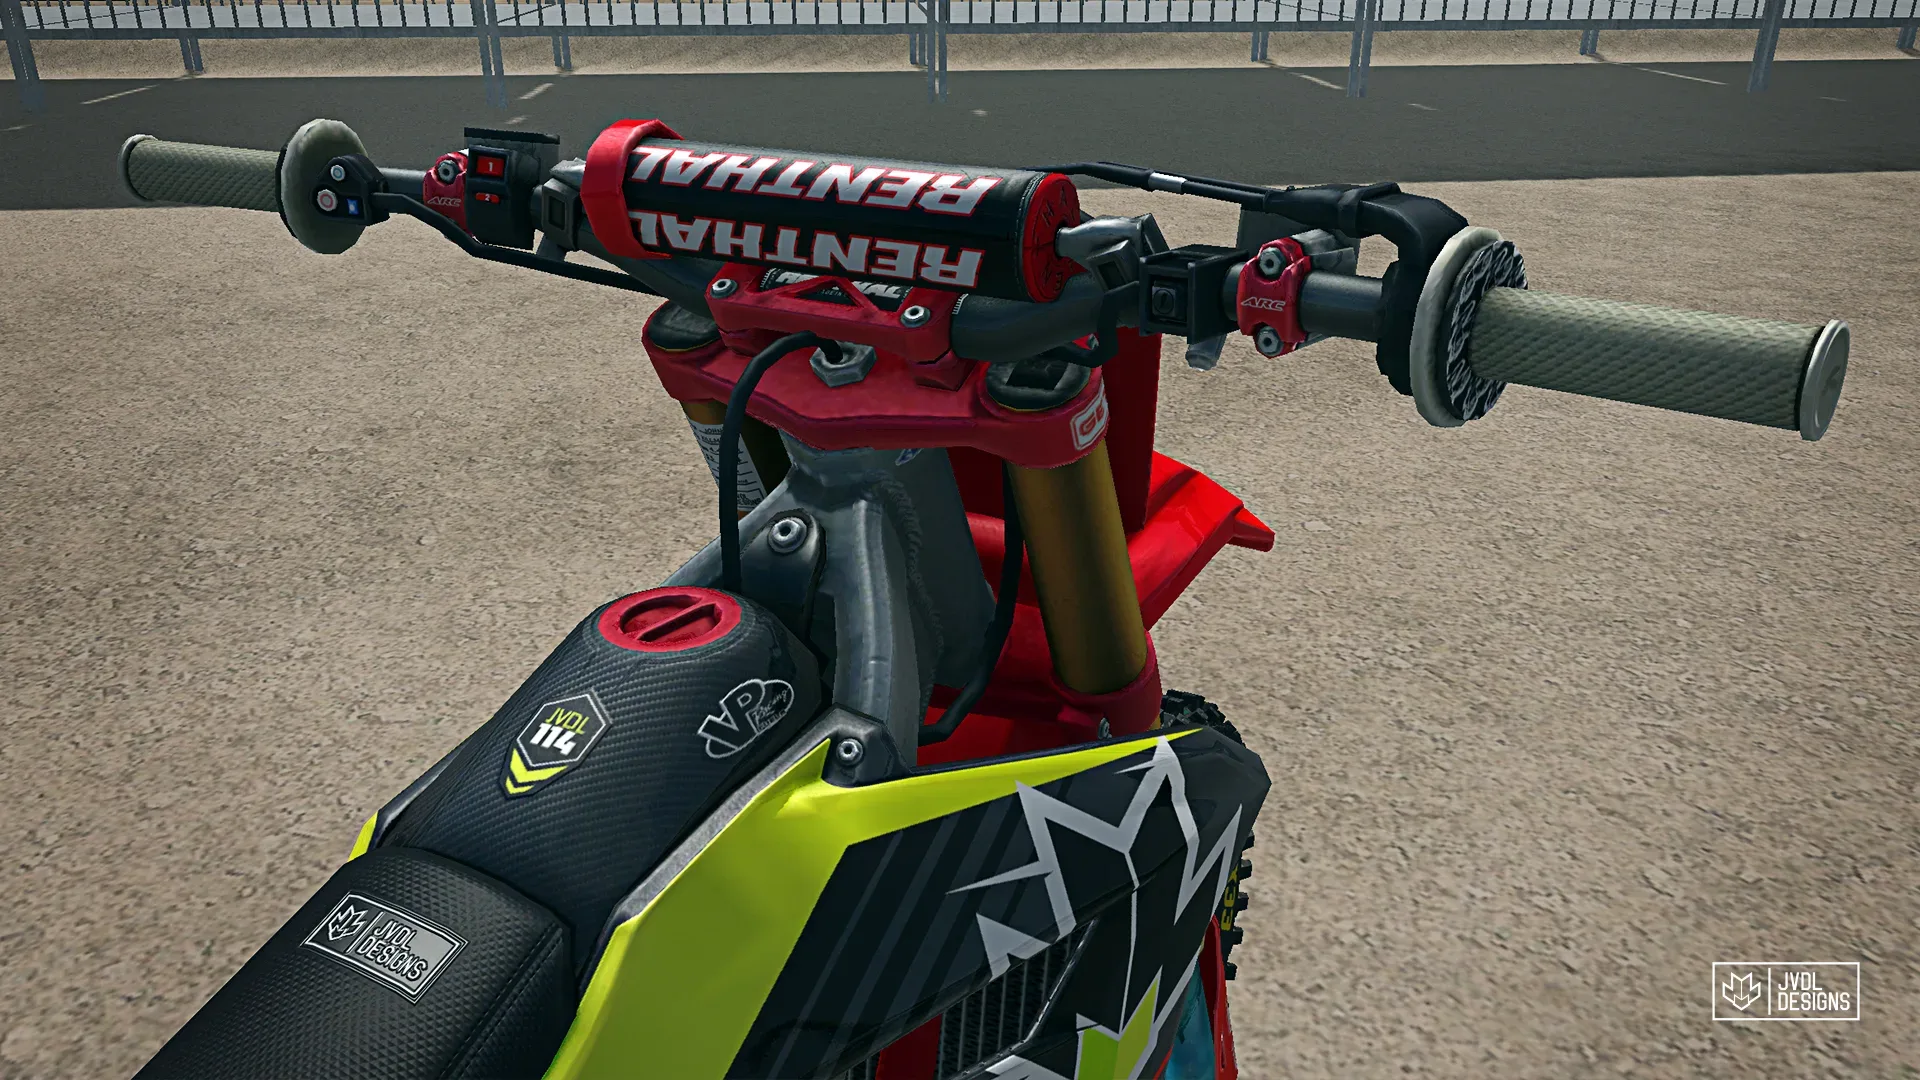
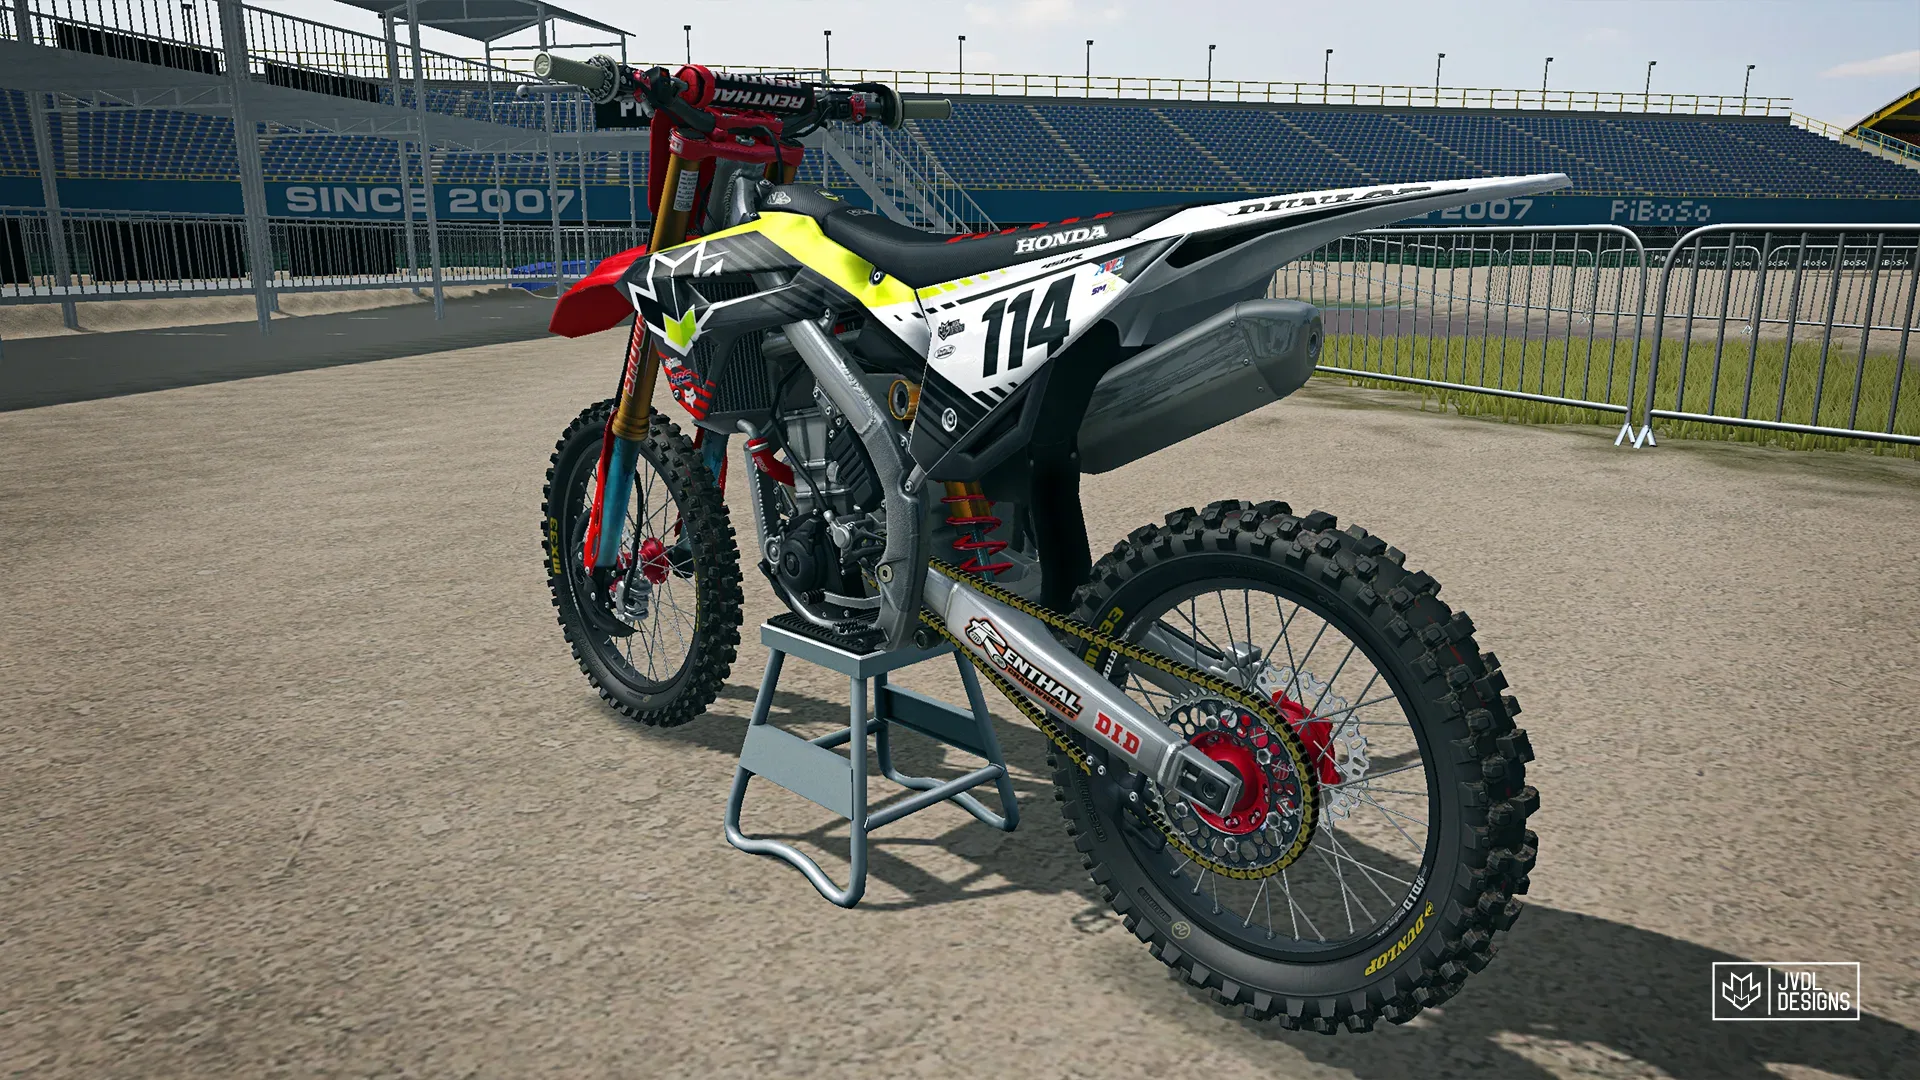
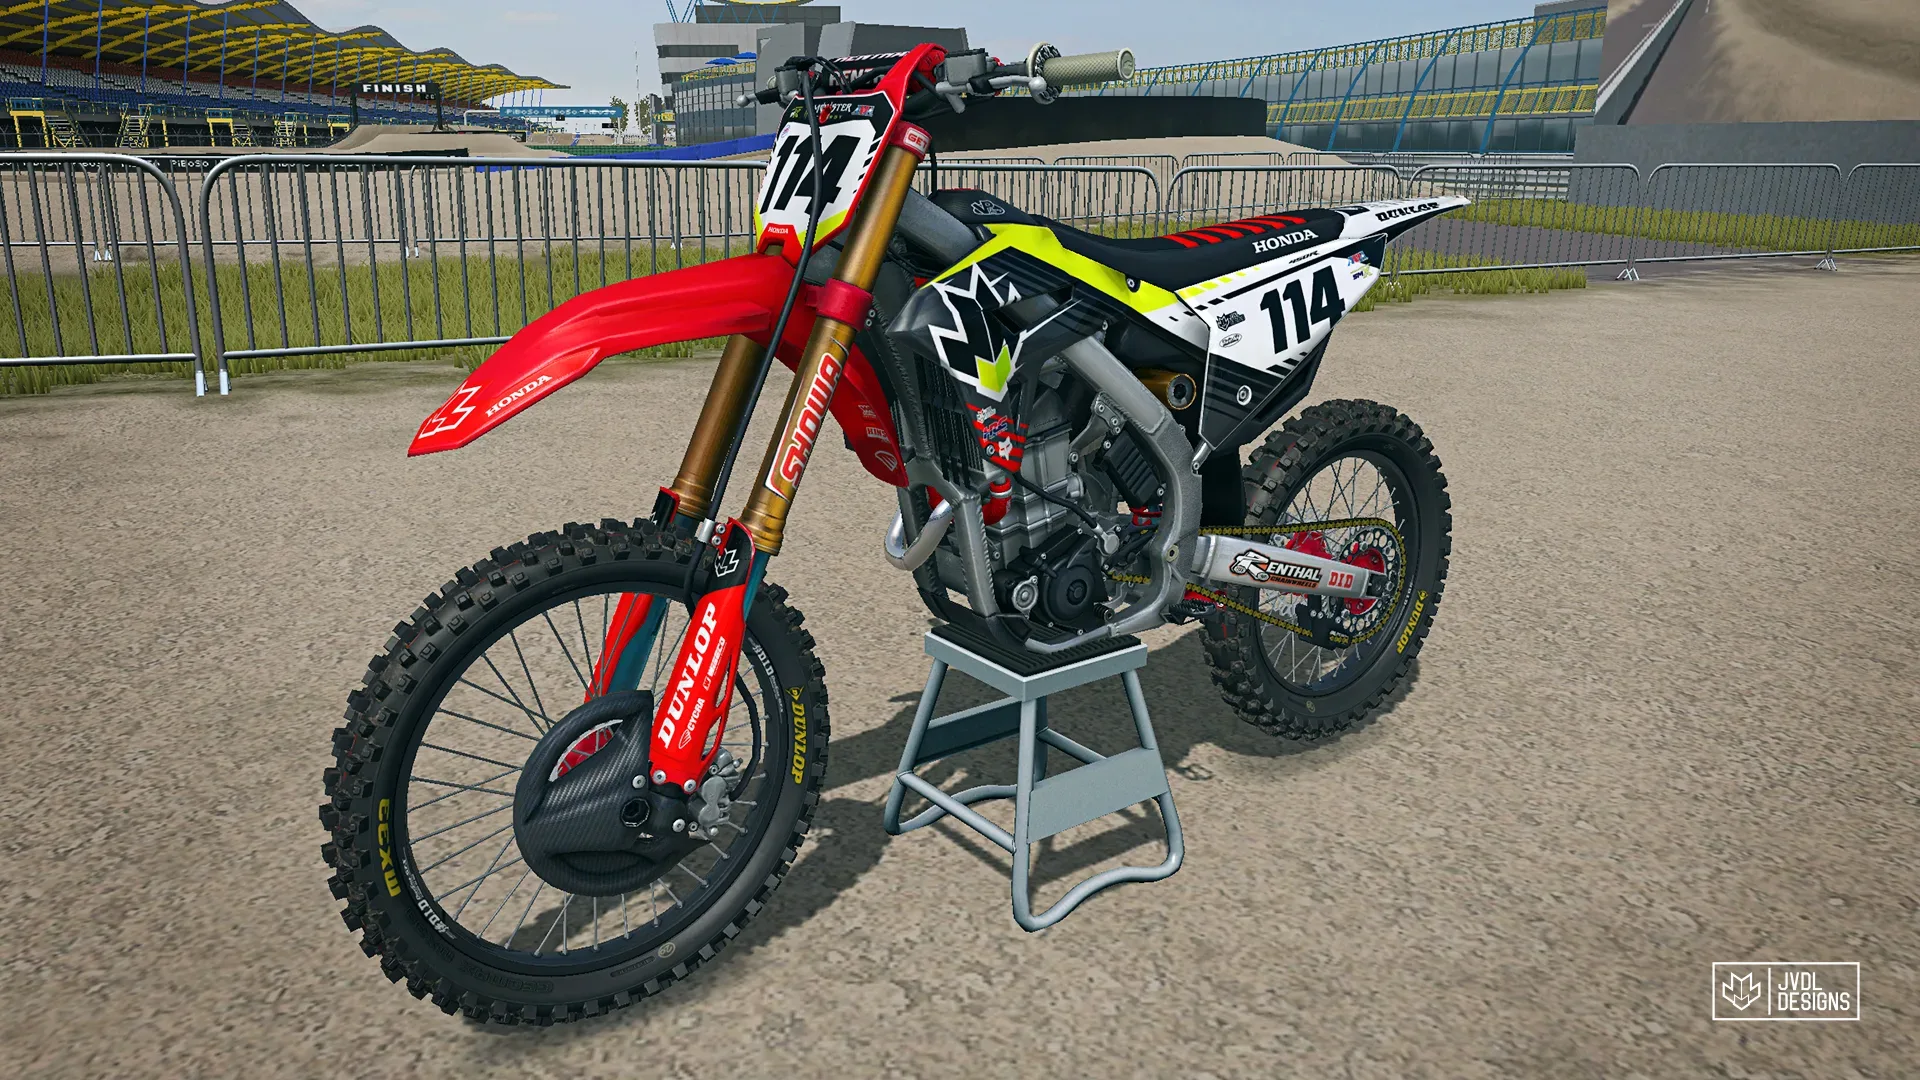
The updated CRF250 and CRF450 maps will be featured in the upcoming OEM update. An updated template will be released at a later date. Other OEM’s will receive the same treatment to boost their visual realness. We have yet to determine a roadmap for these. We will do our best to provide you with more information on the matter as soon as possible.
Sincerely,
John
JVDL Designs

This is amazing work. THANK YOU!!! Really looking forward to this!
Nice Work!!!
Legendary!
This is awesome news! This a much more detailed explanation of what I try to explain to others when making skins. Definitely got frustrated with certain models trying to get realistic looking textures. Always open you want any input!